DIY Star Wars Shadow-box "I love you" " I know"
- alainaa2

- Jul 2, 2020
- 6 min read
So I grew up loving princess Leia. I am planing on doing more star wars related DIYs. So lets get going with this one. I loved making it and hope you do to and also find a way to throw in your touches.

What you will need:


Materials for this DIY:
Size of Shadow Box for your project-Black Extra Deep Shadow Box, 10" x 10" by Studio Décor-$36- https://www.michaels.com/black-extra-deep-shadowbox-10x10-studio-decor/10229048.html
Acrylic paint (more color you get more depth)
black poster board (will up date later when I have info)
scissor
x-acto blade
twizer
Dental Tartar Scraper Tool
black ink pad
E600 glue and supper glue
glitter glue
Duck tape and painters tape
paint brush's per color
one fine tip paint brush for detail work
small part of straw
lego finger for me is Leia and Solo can get from eBay, Esty or extra
epoxy-High Gloss Finish- 8oz-$15.99-https://www.michaels.com/envirotex-lite-pour-on-high-gloss-finish/M10178984.html?dwvar_M10178984_size=16%20oz&dwvar_M10178984_color=None
template you get from inside the shadow box
I did planet sticker-The Solar System Dimensional Stickers By Recollections-$5.39-https://www.michaels.com/the-solar-system-dimensional-stickers-by-recollections/10505019.html
extra small silver stars I had left over from before
Embossing Heat Tool (I'm not sure if blow drier will get to temp needed)
clamps-DEWALT 4.5 in. 35 lbs. Trigger Clamp with 1.5 in. Throat Depth- $5.97- Home depot
black, gold, silver and red sharpie marker
two wine corks
plastic plate
stir stick, two clear plastic cups (for the epoxy)
pads (for under chairs or table) -Everbilt Assorted Felt Pads, Felt Sliders and Bumpers Value Pack-$8.98 from Home depot
Prep:


Get the fabric and stuffing off the backing you need the room for the board and the lego finger.
Making templet sturdier and fit in the inside space:


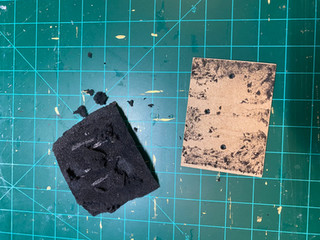
Take the paper out from inside the shadow box will need to add the duck tape to make stronger for al the handling you will be doing with it as you cut. (photo 1)
it is very important that the lip where there fabric you just tock off is not being used so the board fits snugly inside the box. (photo 2 and 3)
cut the board and trip to make fit:


I taped the templet on to the board to make sure it stays in its place as i cut around it. (photo 1)
On the last leg of cutting it out.(photo 2)
as you can see it fits snuggly inside but I did have to trim even after all the prep-work. (photo 3 and 4)
Add splash of color's to the galaxy far far away:


so I used quite a bit of color and i did this with two technique.
The first is with the splatter technique with the brush (photo 5)
The other is the blow technique with the straw. ( photo 7 and 8)
Painting tips:
When using the brush, fully load the bristles with paint (best with a little water added to that paint). Remember to have at least one brush for each color so colors stay that color and do not get muddy looking. Try flicking your wrist toward to objet you are paiting. The wrist action creates concentrated splatters When flicking, move your wrist quickly for thinner lines.
Try tapping your paint covered brush with a stick or another brush to launch your paint, or run your finger along the edge of the brush at close range to the objet for smaller and more delicate splatters. Also use your finger to gently flick paint from a paint-covered toothbrush to create a fine mist.
Dip one end of a straw in the paint and blow into other end up close to the canvas. This technique results in small and concentrated splatters that spread out from a center point.
Simulating the stars shining bright like a diamond in the night sky:


Doing the last two acrylic paint with the bling bling... have two diffrent sizes of glitter.
Prepping and doing the epoxy;


photo 1 I did not feel like i left enough black so I painted some in and add some sliver extra small stars in photo 2
Photo 3 take your black board that you just got done painting after it had fully dried ( i use a fan to help speed that along) turn upside down and line the outside bottom edge with the painters tape. Once done like in photo 4 .
Photo 5 grab your plastic plate and the two wine corks place the corks in the center of the plant make sure the board will not fall over like in photo 6.
Photo 7 grab your two clear cups, staring stick and the epoxy. pour part A in one cup and equal parts B in to the other cup. when ready fallow diretions for mixing the parts A and B together. When pouring go slow and move cup around to get the full surface coverd, set fully dry.
After the Epoxy dry:


Once the epoxy is nice and dry it is shinny.... (photo 1)
when you flip it over you will see why i had you tape this off. the epoxy droplets. that will make it hard to get the flush back when you do put the backing back on. (photo 2)
So grab your Embossing Heat Tool and hold over you project, and move it around and do not hold this close to your item it will destroy if to close and not moving around. (photo 3)
as you can see the Embossing Heat Tool losses the sticky part of the painters tape and you will have nice clean service again. ( i Love this trick) (photo 4)
Marking the spot to glue the Lego finger down:


Take the felt pads and cut off parts so you don't see any when you use the supper glue to attach it to the back of the Lego figure, let glue dry completly. (photo 1)
Pre-position figure in side the box to get the spacing right and mark with pencil. Mark not showing in photo so I'm pointing to it. (photo 2)
Open the ink pad and press the now dry felt pad on to the ink pad to transfer enough ink for transfer. (photo 3)
Once the ink is on pad refund you mark place over and press down on Lego to transfer the ink to better mark.As you can see the results will differ. (photo 4) place them both back inside to see if you need to whip off the ink and replace.
Adding the " I love you" " I know" text:


First draw out you heart with the red marker and outline with the black (photo 1)
Now put glob of the E600 glue down and place lego init then repeat for the other one.(photo 1) Let this fully dry. (photo 2)
Now its fully dry take you silver marker and write out I love you on top of the heart and I know under the heart. (photo 3)
now outline the I with the gold marker, outline Love with the red marker, and the you and know outline with the black marker. (photo 5)
insert in the shadow box. (photo 6)
Attaching the backing:


Use the x-acto blade to cut off the lip that would have slid inside the shadow box but this will not work with the new insert just put inside the shadow box. (photo 1)
Now put several globs of the E6000 glue on the insert to help keep the backing on.(photo 2)
With the next steeps to come you do not want these big gapes so we are filling it with glitter glue. (photo 3 and 4)
Paint the sides of the shadow box and add color to blend the sides to the backing:


Take the twinkle acrylic paint and paint the inside sides (photo 1 and 2)
Now take the colors you want to add stars and dots to blend the sides with the back. (photo 3 throw 5)
Add the planets:


get your planet sticker and mark where you need to cut then with ruler cut with the x-acto blade. Use the supper glue by now the sticky back will not work. Use the Dental Tartar Scraper Tool to help you make small adjustments on the position of the sticker this tight fit will not work with your finger is will pop off the lego. Use the clamp to get full even pusher on sticker and help keep the sticker from moving during the drying. (photo 1 and 2) once dry get acrylic paint that matchers the sticker and use the fine tip bush to make 3D. (photo 3) repeat per planet sticker.


Hang up and enjoy ....
hope to see you again soon for my other DIY's or travel.


Comments