DIY Lost sock holder (Free Dobby) (HarryPotter themed) for laundry room
- alainaa2

- Jun 14, 2018
- 3 min read
So I was getting annoyed with my laundry room layout and space. I went on to Pinterest for laundry room organizing tips. OMG I love Pinterest my hubby hehe not so much. This tock me four full days to finish.

I pre wrote out what I wanted to have the sighn say;
~Free Dobby~
House Elf Liberation Donation Station
S.P.E.W
Society of the Promotion of Elfish Welfare
I found all the materals at Michales:
Long wood bored with cord up top for hanging
Letter stencil
Two Martha Stewart crafts paint: 1)Base coat is Sand Dollar 2)paint for lettering Beach Glass both
Twine
Wooden Clothespins Natural
Medium paint brush for the base coat for the wood bored, can do sponge that scrubs on top of the paint container ( make sure you check to make sure it fits I forgot) or small detail brush.
What I already had at home:
Power screwdriver and drill
Sandpaper
can of of clear stain/sealer and can opener (they will give you one when you buy the sealer)
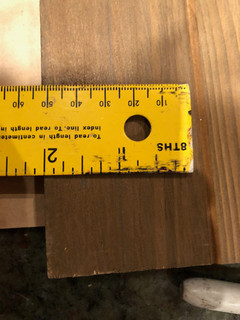
Ruller
pensil and eraser
First pre-measer find the middle of the bottom wood board, and make note. Then I did two inchs on both sides then I marked it with marker. Get your power screwdriver and the drill head size you decide to use that will make threading the twin in early later. I am using 9/64. Once you installed it in the screwdriver and the board is prop up so you don't distort the surface below when you drill throw the wood.


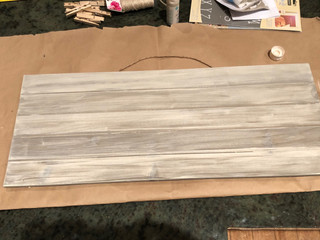
Now that the hole for the twin is drill get little piece of wax paper to put the Base coat: Sand Dollar. I am using a sponge to apply the paint. I did three coats with the Sand Dollar paint. You can see that the whole you drill fills with paint, I used end of a detail brush to push the paint down and clear the whole each time I did a coat.
When paint is try run your hand over to make sure it is smooth. I had one rough patch so I only needed small amount of sand paper. I used a light pressure and small cereal motion with the sandpaper do little at a time to your desire smoothness then brush off any dibree. Shake the can clear stain or seler to make sure it is mix. use your brush to coat thin layers ( it drys faster) I did three layers of the clear coat.


Wait and I do mean wait till the the clear stain/seller is dry because if like me and you don't wait and you use the pensil when still damp you will not be able to erase the lines (trust me).
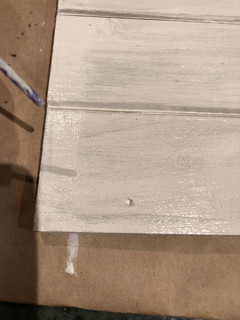
I am using two diffrent fronts One is all caps and other all lower case letter's ( m photo). I pre cut the letters and had them in alphabetical order with my dyslexic moments I need to do this for the db qp ,extra...
So I found my note i made with measurement of the measurements for horizonta and vertical to know how to divid in to fourths ( left photo). then on on paper I did rough drawing and wrote out what I want so I can adjust spacing when doing the DIY ( right photo)


As you can see in the first photo I cut the letter's and have my cheat sheet in two places and cross out the leter's when I paint them in. I started with letter closer to the line and worked my way out. you can see in the M. photo the i is lighter shad green then the other letter's around that is because it is still wet.


General info:
Tying to show how I did the lettering:
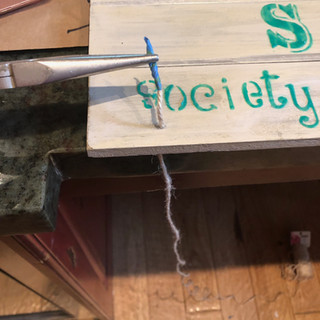
time to string the twin...
I used some paint tape I had laying around after the 1/2 bathroom project. I had to use the tape because the twin keep coming on done when I tried to tread it throw the hole on the left side. I had to use a needle nose pliers to help me push up from the bottom and when their is enough tape to pull trow. then I pulled over to the right side, made slake, pushed, and pulled throe right side's hole. I tied off the right side. then double check the amount of slake in the twin and then tied off the Left side. Then I got the wooden clothespins and put some on the twin.


Then hung the sign in the laundry room


Thank you hope you enjoyed my first DIY's. Bring art and whimsy in to your day.


Komentarze